Friday, May 17, 2013

Copycat Challenge Numero Uno

I think every town has one restaurant that’s been deemed “the fancy place” by the locals. In my hometown of Wausau, Wisconsin it’s a place called “2510”. It’s an older supper club type place, not my first choice for dining, but it has one quality that is hard to ignore, and that’s the bakery.

This place makes FANTASTIC cake!

Ask anyone around here and they would probably knock over three little old ladies and a small child to get to the cake they make at 2510! I, myself, am one of them! However; cake aside, they also have another locally famous dessert, and it is the coveted:

“Death by Chocolate”
(Henceforth referred to as D.b.C)

Now; I’m going to piss off a lot of people when I say that I don’t really think the D.b.C. deserves all the accolades that it gets (ducks to avoid empty dessert glass being thrown at head). The first and only time I tried it, I thought it was more like an average pudding cup or parfait. A bit of brownie layered with some chocolate mousse, whipped cream, and topped with toffee bits.

HOWEVER, (SHIT…stop throwing dessert glasses at my head already!), who doesn’t like a pudding cup, right?! Just because I didn’t think it was God’s gift to the dessert tray doesn’t mean that there aren’t HUGE D.b.C. fans out there!

I happen to be related to two such fans; my Sister-In-Law and her husband are tremendous fans of the D.b.C! Since I’ve been toying with the idea of trying to replicate 2510’s dessert recipes (I’m going to make that cake someday dammit), they seemed like the ideal folks to be my taste-testers.

With Mother’s Day coming up, rather than send my husband into a frenzy trying to think of a present, I thought a nice evening at the local casino followed by my sleeping in on Sunday sounded like a great Mom’s Day present!! BUT, we needed a sitter. Cue fabulous Sister-In-Law and her husband! I can pay them with pizza and D.b.C! Everybody wins!!!

But I need a name for my D.b.C., something unique, something that sets it apart from its inspiration; in honor of Mother’s Day, I present to you:

“Mommy’s Little Helper”
(Henceforth referred to as M.L.H”)

Now, I’ve made chocolate mousse only once before (see Big Ass Cake) and I could hardly stop myself and my husband from licking the bowl, so I consider it a raving success!
I also needed a really good fudge brownie to be a base for the mousse and whipped cream. I hopped onto Pintrest and searched “best brownie”, where I stumbled upon this lovely recipe. The pictures made it look super fudgy, moist and delicious, and the reviews I read were stellar! It was a really easy recipe and the only thing I did differently was I sifted all the dry ingredients together, and I used the stove to melt the butter and sugar. My husband and I have both declared this the best brownie ever! Thanks Yammie!!!


Prepare the brownie as directed by Yammie and allow to cool completely, store in an airtight container until ready to assemble M.L.H. You will only need about ½ of the pan of brownies, so you’ll have plenty extra for snacking! I removed the brownies from the pan onto a large cutting board, cut the slab in half and cut off the edges, I then pulverized the crunchier edge pieces in the food processor for the “crumb layer”, then I cut the rest into about 1 inch cubes.


Now we make mousse!

Chocolate Mousse
4 Large Egg Yolks
1/4 Cup Sugar
1 Cup Whipping Cream
6 Ounces Semisweet Chocolate Chips
1 1/2 More Cups Whipping Cream

Prepare chocolate mousse by beating egg yolks with mixer on high speed for 3 minutes, or until thick and lemon colored. Slowly beat in sugar.

Heat 1 cup whipping cream in 2-quart saucepan over medium heat until just hot, but not boiling.

Gradually stir in about half of the cream into the egg yolk mix then stir back into the hot cream in the saucepan. Cook over low heat about 5 minutes, stirring all the while, until mix thickens (DON'T BOIL IT!)

Stir in all the chocolate chips until they melt and are mixed in completely, this can take a while! I found using a whisk to be helpful in breaking up all the tiny bits of un-melted chocolate. You could also run chocolate through a sieve if you want to.

Cover (I use a damp tea towel) and chill about 2 hours, stirring occasionally, until chilled. Throw a metal bowl into the freezer now, you’ll need it later!

Once the chocolate mix is ready; beat the 1 1/2 cups whipping cream, in your chilled mixing bowl, on high speed until stiff, fold the chocolate mix into the cream.


Now; for the whipped cream:

Whipped Cream
1 Cup Heavy Cream
2 Tbsp. Sugar
1 Tsp. Vanilla

Whip the cream on medium, add the sugar and vanilla extract and keep whipping until soft peaks are achieved. Put in fridge until ready to assemble. This is how I proceeded:

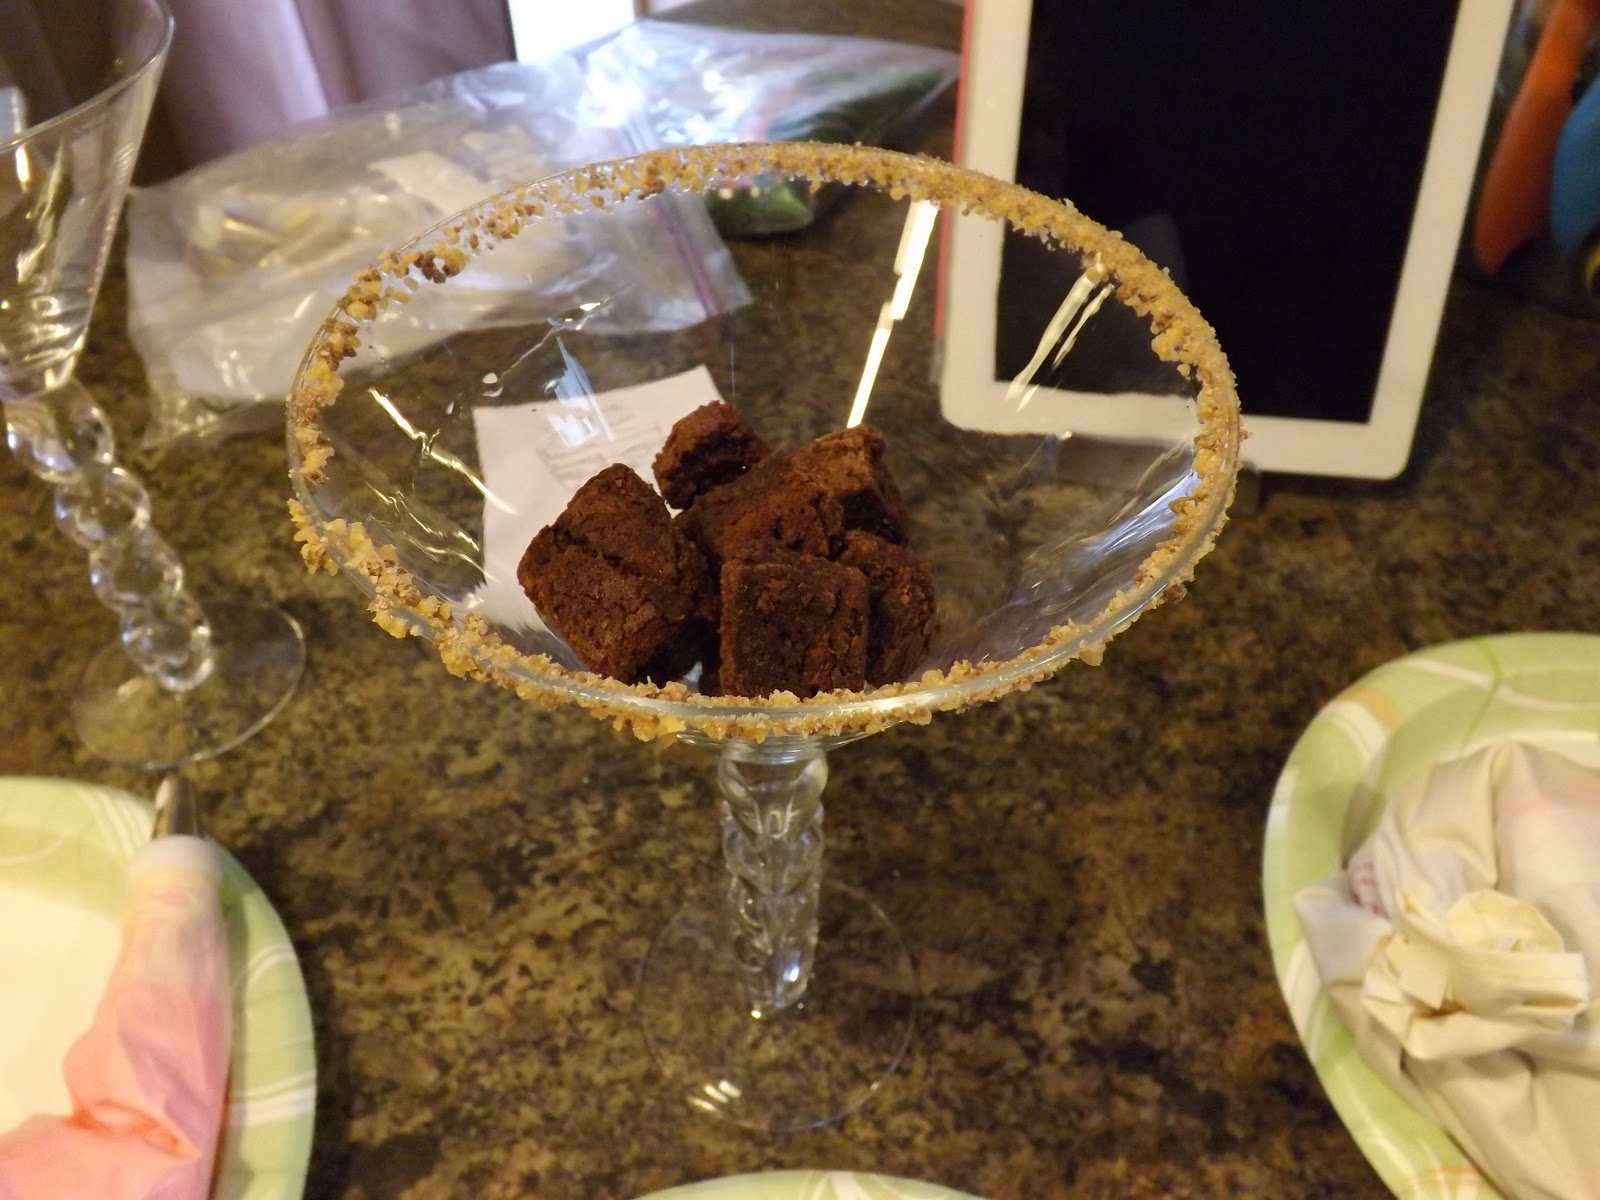
Get out 5 LARGE martini glasses, fill one with cocktail of choice…drink the cocktail, it’s almost mother’s day, you deserve it!!!

My brother-in-law is anti-Heath Bar (yeah, what’s with my family huh? Some don’t like chocolate, some don’t like Heath, and my Dad thinks Peanut Butter is poisonous…sometimes I swear I’m adopted), so no Heath for Him! I rimmed the other glass (for my sister-in-law) with powdered Heath Bits (I used my Magic Bullet to pulverize the already small bits into something more microscopic suitable for rimming).


Rim glasses if desired, and place the whipped cream and mousse into piping bags for easy layering.


Assemble everything in a glass or dessert bowl thusly, starting at the bottom:

TOP
Heath Bits
Whipped Cream
Mousse
Brownie Crumbs
Whipped Cream
Mousse
Brownie Chunks
BOTTOM


Store, covered lightly with plastic wrap, in the fridge until ready to serve.
  
Now for the final verdict:


Since I’ve been Low-Carbing it for the last two months with not one single slip-up, I’m celebrating tonight and eating carbs! This dessert was FANTASTIC! These brownies were FANTASTIC! Everything about this dessert was FANTASTIC! Maybe it’s the sugar talking, but I’m marking this one down in the “success” column! My in-laws thougrally enjoyed their dessert payment for baby-sitting, and a good time was had by all! To top things off, we came home ahead from the casino (YAY) and I got to sleep in on Mother’s day!

 
Thanks again to Yammie for the fantastic brownie recipe!

<script type="text/javascript" src="//assets.pinterest.com/js/pinit.js"></script>

Thursday, April 4, 2013

Easy Like Easter Morning...


Greetings!

I told you I’d be back!

Since I promised I would still bake and blog for special occasions, and an Easter dinner with family counts as a special occasion; here I am to regale you with another culinary tale from my messy kitchen!

Now, the hubs and I have caught the good ship “Atkins Diet” and set sail a few weeks ago, I felt that it was only proper to bake, not one, but TWO desserts for Easter! One 'normal' dessert and one 'Atkins' dessert.

The Atkins dessert was easy enough to settle on. We’re both in the earlier stages of the diet and there were only a few recipes for me to pick from. HOWEVER, choosing a “normal” dessert…SO HARD!

I poured over the blogs, cookbooks, Pintrest, you name it; looking for something springy, fresh looking and (for whatever reason) it needed to contain lemons. Lemons seem to equate spring in my noggin!

I finally chose a lovely bloggers recipe for “Lemon Pound Cake

I loved that this recipe was in grams and cups for measurement. I actually prefer baking with my kitchen scale rather than measuring cups. It seems more accurate to me.


It turned out quite lovely and didn’t require a lot of complex ingredients. My only comment was that I wasn’t able to pour the icing onto the cake; I had to spread it on with a cake spatula. I’m sure I could have added some cream or milk to the icing to change the consistency, if I make again, I’ll be sure to do that!

For my “Atkins Offering”, I chose "Decadent Chocolate Cake". A lovely, flourless, little number with a whopping 3.5 grams of carbs that looks quite like a brownie.

The process for making this cake was a tad more complicated than the pound cake, but worth it, nonetheless.

 
I topped this with some freshly whipped cream (into which I whipped 2 packs of Splenda for sweetness), and the hubs and I were happy to be able to enjoy dessert along with everyone else!

Friday, March 15, 2013

Confessions of a food blogger…

Hi, my name's Jill (say it with me now..."HI JILL!"); and I'm a compulsive overeater, food addict and chronic dieter.

There, I said it.

This is something I haven’t said in a long time, but it’s time I said it again. I have issues with food. I’ve always had a sweet tooth! I LOVE all things baked, cookies, cupcakes, cheesecakes, pastries, DOUGHNUTS, you name it and I’m in love with it! The more, the better! I can’t stop at one cookie, I have to have a stack of them. I can’t take a sliver of cake, I want a big ‘ole slab and HEY, while we’re at it, throw a big ass scoop of ice cream on there too! I’m a go-big-or-go-home kind of gal and it shows in my eating/dieting habits!

On the other side of the coin, I’m a chronic dieter. I recall a former co-worker once asking me “what weird diet are you on this week” and that summed it up perfectly! I’ve been on them all! Weight Watchers, Lean for Life, Atkins, Detox, Slim Fast, Juice Fasting, even this bizarre plan where I was drinking hot lemon juice in the shower with flax seeds jumping up and down trying to get my “lymphatic system” in synch. I wish I was kidding about that last one…

Is there a point to all this? Yes, stay with me now;

I’ve got to lay off the baking…for a while. As a result, I’m breaking one of my bloggers resolutions to post more, but something’s got to give! I LOVE baking, but the temptation is too much for me when the stuff is around. I will still bake for special occasions and I promise I’ll blog about it when I do!

Don’t worry, I’ll be back!


Tuesday, February 5, 2013

Blogger's Resolutions and a Big Ass Cake!


Happy belated New Year!

I’m back from a busy couple of months and I’ve brought with me my blogging resolutions and my first recipe creation!

First, the resolutions:

1.      Post More. For a while I was posting once every 2 weeks; then it slipped…BAD BLOGGER, BAD. Sometimes one just needs to get off of one’s dead ass on a weekend, bake, and blog it out!

2.      Be Real. I’ve been trying to be couth and not swear in my blog, just like I try not to swear in front of my toddler, but I need an outlet! Truth be told, I have a mouth like a sailor, and I’ve decided to blog as I would speak…which includes my colorful commentary.

3.      Be honest about my kitchen. I really appreciate all the beautiful food blogs that show a pristine, Food Network quality, kitchen and I tried to do it, but it’s just not a reality. Don’t get me wrong, my kitchen is clean. I would proudly serve anything I make in my kitchen to anyone! But when I cook or bake, even though I try to clean as I go, it still looks like a powdered sugar bomb went off. So, chances are, you’re going to see ripe bananas in the background, a bowl of onions and whatever else has found its way to the catch-all-counter top.

4.      Finally, I really believe that I’ve learned a lot about baking, and I will continue to learn, but I want to try and create more desserts of my own.

This being said, I now present to you my first creation:
Chocolate Covered Cherry Chipper Cheese/Cake!!

I spent the holidays making so many wonderful desserts that I’ve found from all over the net and my piles of cookbooks (see below), I felt it was really time to try and create something of my own.
Fa-la-la-la-la Bitches!

I thought a Valentine’s Day recipe was in order, and the first thing I thought of was how much I used to love Betty Crocker’s Cherry Chip cake with the canned Cherry Icing when I was a kid. It’s still probably my very favorite cake! It is hard to find though, usually I can never find the cake mix and the icing together in the same store, so I decided it was time to try and make my own.

What goes great with cherries? CHOCOLATE!! Especially this time of the year! I figured a whipped ganache was somehow in order, but I wanted more. I’m not a huge fan of a chocolate cheesecake, so I thought it was time to learn how to make chocolate mousse to hide between layers of cake and cheesecake. To top it all off, I needed a cherry buttercream, but not something so artificial tasting as what you would get from a can.

Cherry Chipper Cake
2 1/2 Cups Cake Flour
1 2/3 Cups Sugar
1 1/4 Cups Whole Milk
3 1/2 Tsp Baking Powder
1 Tsp Sea Salt
1 Tsp Almond Extract (I use Penzeys)
5 Large Egg Whites, Room Temperature
1/2 Cup Finely Chopped Maraschino Cherries (moisture squeezed out, save Cherry Juice for Buttercream)

Preheat oven to 350. Grease bottoms and sides of two 8 inch pans with shortening and line the bottoms of the pans with parchment rounds, grease the parchment paper, lightly flour the whole deal and tap out excess.

I REALLY need to invest in those pre-cut parchment rounds!

Beat all ingredients except egg whites and chopped cherries with mixer on low for 30 seconds. Scrape the bowl down, then beat on high for 2 minutes, scraping occasionally.

Beat in egg whites on high for 2 minutes scraping occasionally, then add chopped cherries and stir in on low for a bit, just until cherries are nicely mixed in.


Bake for 20-28 minutes, or until cake springs back gently to the touch (don't be a dumb ass and burn yourself! Trust me, I've been there!)

Cool for a few minutes in the pans on a rack, then turn out and remove parchment. Allow to cool completely, level with a large serrated knife, wrap in plastic wrap and throw those babies into the freezer for a long winters nap (a.k.a. overnight).

Looks just like Betty's huh?

Now for the cheesecake. I used Heather from Sprinklebakes cheesecake layer recipe from her FANTASTIC Peanut Butter Cup Chocolate Cake Cheesecake. I'm a huge fan of this recipe, and the technique for making it that doesn't require a water bath (YAY)!

I managed to get the cheesecake put together and baked up without incident, and threw the pans straight into the freezer to chill out with it's cakey brethren until frozen solid while I whipped up my very first Chocolate Mousse.

Chocolate Mousse
4 Large Egg Yolks
1/4 Cup Sugar
1 Cup Whipping Cream
6 Ounces Semisweet Chocolate Chips
1 1/2 More Cups Whipping Cream

Beat egg yolks with mixer on high speed for 3 minutes, or until thick and lemon colored. Slowly beat in sugar.

Heat 1 cup whipping cream in 2-quart saucepan over medium heat until just hot, but not boiling or anything.

Gradually stir in about half of the cream into the egg yolk mix, then stir back into the hot cream in the saucepan (nothing worse than scrambled eggs in one's mousse). Cook over low heat about 5 minutes, stirring all the while, until mix thickens (DON'T BOIL IT, YO!)

Stir in chocolate chips until melts and mixed in completely.


Cover and chill about 2 hours, stirring occasionally, just until chilled. For us folks out in Wisconsin where it was a balmy 11 degrees outside this weekend, this meant putting it in the garage.

Once chilled, beat in the 1 1/2 cups whipping cream in a chilled bowl (again, thank you Wisconsin and your frigid winters) on high speed until stiff, fold the chocolate mix into the cream.


Remove the cheesecakes from the freezer, trim any excess that's protruding up from the pan, remove cheesecake from pan, line pan with parchment so it's sticking out on sides, then throw cheesecake back in there. Divide the mousse between the two pans of cheesecake, leveling it off so it's even with the top of the cheesecake.


Wrap then entire pans with plastic wrap and put them back into the freezer for the night. Now, enjoy some cake scraps with a cold one and go to bed! The whole shebang will be there in the morning!


Ahhh, Sunday, no birds chirping, it's far too cold here for that, just a nice white blanket of frozen tundra staring back at me, maybe a fat squirrel romping around in the back yard looking for his nuts...time to assemble and ice-ice this baby!

I decided that I needed a cherry buttercream, but I didn't want to have to use any additional food coloring. As luck would have it, those maraschino cherries come floating in a neon red/pink juice...PERFECT!

Cherry Buttercream
4 1/2 Cups Powdered Sugar
1 1/2 Cups Room Temperature Butter
1/2 Tsp Vanilla Extract
3 Tbsp Whipping Cream
1/4 Cup Maraschino Cherry Juice

Using the whisk attachment for the mixer, mix powdered sugar and butter (adding butter a few chunks at a time) on low until well blended, then increase speed to medium and beat for about 3 minutes. Add vanilla, whipping cream and cherry juice and beat on medium speed for about another minute. If you'd like the color to be more pink, or would like more of a cherry flavor, you can add more juice or even some pink or red food color, but you may need to add a tad more powdered sugar.

Now for the whipped ganache. I used the same whipped ganache as in Sprinklebakes Peanut Butter Cup Chocolate Cake Cheesecake, it's so lovely and rich and light! I could eat it by the spoonful (and my husband and son did just that)!

Now to get this baby together!

The layers are as such:

Top
Cheesecake (mousse side down)
Ganache
Cake
Ganache
Cheesecake (mousse side up)
Ganache
Cake
Bottom
Once everything is stacked up, it's into the freezer (or Wisconsin Garage) for a while (covered with a tea towel). As for me, I cleaned my kitchen floor old school style. Hands, knees, sponge, bucket. Sucks ass, but it works. So let's say for about an hour. Then trim it out so all the layers are the same size.
"Oh HONEY...There Are Cake Scraps For You!"

Now to ice. This is the way I roll. I don't care for the traditional "crumb coat". I've found that using the ginormous piping bag fitted with the icing tip works like a charm! Get the cake covered, then use a offset icing spatula dipped in hot water to smooth the whole thing out!


Now for a few simple garnishes, I used the remaining whipped ganache in a piping bag fitted with Wilton's 1M icing tip to pipe some little swirls on the top and a nice little border on the bottom. Then I took some whole maraschino cherries, which I dried off with a paper towel, and perched them on top!


Since this is a Valentine's Day cake, it needed a heart, which I did with a cookie cutter and some sanding sugar. I used the paint brush to spread it out, then outlined with more whipped ganache.


One word...YUMMY!

I took this baby over to my parent's place for the Superbowl where we proceeded to devour it! My sister even asked if I was going to leave it there when I left (which I did)! As yummy as it was, if it were in my house, I would be eating it three meals a day for a week!!

Now for the accolades! I came up with the flavor concept for this cake on my own, but I was inspired by so many great bloggers! I got the cheesecake layer recipe from Heather at Sprinklebakes; I also credit her for teaching me the method for adding the filling to the cheesecake layers. For the cake base and chocolate mousse, I credit the Betty Crocker cookbook. Thank you so very much!!

 I’m happy to say that the buttercream was all me!! Enjoy!

Saturday, December 8, 2012

A Bake-Tastic Thanksgiving!

Yeah, I know. Thanksgiving was a little while ago, but cut me a break! I've been a busy gal!

Over the Thanksgiving holiday I had two events to attend. One being Thanksgiving over at my Mom and Dad's, the other being my parent's annual "First Saturday After Thanksgiving" party. I'm always the "dessert bringer", so I decided that I wanted to make three different desserts from three different recipe sources!

My first dessert was for Thanksgiving itself. I chose a recipe I found on Pintrest; Martha Stewart's Maple Cheesecake with Roasted Pears.

I finished up work at 11:00 in the morning the day prior to Thanksgiving to attend my son's "Pie with Parents" event at daycare, then came home to run, clean, do laundry and start baking!

The cheesecake has a lovely Nilla Wafer crust, so I dragged out my trusty food processor and started on that right away!


Once my crust was out of the oven and cooling, I got my other ingredients out and started getting them warmed to room temperature while I attended to my time on the treadmill.

Mmmmmaple Syrup; YUM!
 
 
Now I was ready to get to baking my cheesecake! Then I read the recipe a little more closely, and I realized HEY! THIS IS A NO-BAKE, WTF!? A FREAKIN' NO-BAKE?! I haven't come this far in my baking journey to show up to Thanksgiving with a NO BAKE! Now, in years past, no biggie, but I've become arrogant and proud of my baking efforts of late, and I was actually insulted by the idea. Well, not too insulted...I already had all the ingredients and the crust was baked up and ready to go...I might as well do as Martha Stewart commands and press on!
 
I whipped up my filling, which was delicious! The maple syrup is a nice addition!
 
 
There's something special about a bowl of whipped egg whites, don't you think?
 
Now that the filling was in the crust and happily "Not Baking" in the fridge for the night, it was time to make my roasted pear topping! This is where things got interesting...
 
 
I lovingly brushed my pear slices with maple syrup and placed them in the oven for roasting. The roasting part went quite without incident, then it came time to throw them under the broiler...turns out, parchment paper (like it's other paper brethren) is flammable...
 

Luckily, all you need to do it close the oven door, and the fire will smother itself from lack of oxygen, and the pears were just fine! They had a nice color after their momentary brush with death!
 
Once gently arranged on the cheesecake, my dessert was actually quite appealing to look at!

 
The cheesecake was, indeed, very good! But I have some commentary. First, It's difficult to slice with the pears on top because the cheesecake itself is not very dense at all. This is probably due in part to the fact that it was a no-bake.


I think that I would actually like to try and make a traditional, water bath, cheesecake utilizing the same maple flavors and pear topping some time in the future! I'm getting to the point where some culinary experimentation might be in order!!
 
Now, Thanksgiving dessert aside, it's time for party desserts! I love making the desserts for my parent's party! So much so that I actually start looking for dessert ideas months in advance. This year, I upped the dessert quota from one to two, as I have some family members that (yeah, crazy, I know) don't care for chocolate?! GASP! I suppose it's OK. To each their own right? After all, I don't like mushrooms and I have family that think that it's something of a character flaw, so I guess I won't hold it against them. So. I opted for one chocolate/peanut butter dessert and one non-chocolate dessert.
 
For my chocolate offering, I chose my favorite go-to dessert gal Heather's Peanut Butter Cup Chocolate Cheesecake! I've wanted to make this ever since I discovered her Sprinkle Bakes blog earlier this year!! It just strikes me as the perfect combination of peanut butter, chocolate cake, caramel and cheesecake!!
 
If you're planning on making this, heed Heather's warnings! It's a monster and should be made over the course of a few days! I, myself, started on Black Friday (I don't shop with the crazies, I'm more of a Cyber Monday gal, so nothing lost there).
 
The ceremoniously unwrapped a bag of mini Reese's Peanut Butter Cups and about 2 bags of caramels and set to work. The recipe uses an entire bag of PB cups and I think I had to slap my husband's hand away more than once!
 
 
Next came the cheesecake batter (REAL CHEESECAKE, nothing 'no-bake' in this recipe)! YUM!
 
 
So fluffy, so yummy, throwing caution to the wind, I had a spoonful or two of batter, raw eggs be damned! I found this on my pal Linda's Pintrest Page...Sums it up perfectly!
 
LOVE IT!
 
I was happy that I didn't need to do a water bath though! Not that I mind, it's just an extra step! I threw together the caramel sauce in the microwave and got the cake layers baked and topped before getting everything wrapped up and into the freezer for the night!


Now that I was at a stopping point with my Chocolate dessert, it was time to start on my non-chocolate dessert; Lemon Meringue Pie!
 
I've never made a meringue pie of any kind, too scared to tell you the truth. I've heard the horror stories about filling not setting up, meringue that fails and I just never ventured into that section of the cookbook. However, my Dad has waxed poetic for years about his late mother's famous Lemon Meringue Pie, so I figured, what the hell. No time like the present!
 
Much to the chagrin of my Mom; Grandma Miller didn't really write down her recipes. She just BAKED. HOW TO PEOPLE DO THAT?!?! My Mom has been trying for YEARS to replicate her apple coffee cake, so I figured I'd just go with the Food Network app that I've had for a few years and search there. I typed in Lemon Meringue Pie and filtered by rating, it came down to a close race between Alton Brown and Paula Deen. After reading the reviews, I opted to go with Ms Deen's recipe, doubling the filling and meringue as per the suggestions I read in the reviews.
 
I decided that real, fresh squeezed, lemon juice was only appropriate, so I unearthed the citrus-squeezer that I typically reserved for margaritas and got a'squeezing!
 
 
I did break down and use one of those refrigerated pie crusts that they sell in the grocery store, simply because I knew that I was going to be doing a lot of baking (and Paula Deen said it would be OK).
 
 
Now, time for the meringue! I had made meringue cookies last Christmas, so I wasn't too terribly daunted by the concept. The only thing I really needed help with was making sure that I really had stiff peaks. Thank you Google Images!!!
 
 
Stiff Huh?
Now that I had my meringue, I slapped it artistically on top of my pie and threw that bad boy into the oven!
 
 
I did heed some of the recommendations in the comments on Paula's recipe page and upped the heat and baking time a bit to make sure that the eggs were cooked all the way (and I was really hoping that everything would set up well)!
 
 
Pie out of the oven, garnished and cooled! Pie into the fridge and I into the bed for the night! Hopefully it will taste good for the party! Tomorrow, we assemble the monster Chocolate Peanut Butter Cup Cheesecake!!!
 
Some much needed sleep later (and once minor incident with the little one, must have been the Mexican food), it was time to get to putting the cheesecake together!
 
 
Trimmed and ready to go! Time to make my whipped ganache and ice this baby! The only thing I would change would be making 1 and a half batches of ganache, just to have enough to really go around without having to scrape the bowl! The peanut butter butter cream is really what made this cake beautiful! But keep in mind, you will want to keep this in the freezer! I did have some caramel seeping out through the ganache...
 
 
Once sliced and dished out, I think everyone was pleased with the selections! The cheesecake was AMAZING!!! Probably 2000 calories a slice, but amazing none the less! I would make this again in a heartbeat!!
 
 
The Lemon Meringue Pie was great as well! The greatest compliment came from my Dad who said it tasted JUST LIKE HIS MOM'S!!! He said that the only difference was that her filling was a tad more yellow in color. Must have been the lemons!
 
 
All in all...success all the way around! Score one (or two) in my baking 'YAY ME!' column! Tomorrow, it's back to more baking! I'm heading over to my Mom's to bake cookies with her, my Grandma and sister!